Monitor the Exchange user experience with WPM
Web Performance Monitor (WPM) monitors the performance that end users experience during web transactions. WPM records the transactions you want to monitor and then plays them back at regular intervals. If the time required to perform any of the steps within a transaction is higher than the specified threshold, WPM alerts you.
When you add WPM to your Exchange monitoring solution, you get a view of what users experience when they access Microsoft Outlook. You are alerted if accessing Outlook takes significantly longer than usual.
Prerequisite
Complete the following task, if you have not already done so:
Configure WPM to monitor Exchange
To configure WPM to monitor Exchange, complete the following tasks:
-
Choose the playback location. This is the computer that will be used to play back the recording.
If NetPath is configured to monitor the path to your Exchange servers, the same servers that act as NetPath probes can also be used as WPM playback locations.
- Add that computer as a location in WPM, and install the WPM player on it.
- Record the steps that you want WPM to play back (in this case, logging in to the OWA page).
- Create transactions based on each recording. Transactions are played back at regular intervals, and they generate alerts if the playback time exceeds the specified thresholds.
Task 1: Choose the playback location
The playback location is the computer that will be used to play back the recorded transaction. To make sure that WPM accurately captures the performance that users experience when they access Exchange, choose a playback location that meets the following criteria:
- The computer is in the same geographic location as most end users. For example, choose a server in a branch office.
- The computer is always on. For example, don't choose an end-user's workstation, because it might be turned off.
- The computer meets the player requirements.
If the office has a hypervisor running various servers, such as a print server or file server, consider adding another server and installing the player on it.
Task 2: Add the location and install the player
After you choose the playback location, you must add it as a location in WPM. To add the location, you must know:
- The IP address or machine name of the computer where the player will be installed
- Credentials to log in to the computer
If you choose a location that already has the WPM player installed, you can add the location without installing the player. In this example, the WPM player is not installed in the selected location.
- Choose Settings > All Settings.
- Under Product Specific Settings, click WPM Settings.
-
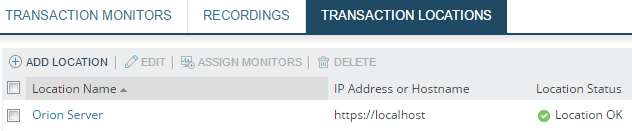
Under Transaction Management, click Manage Player Locations.
The Transaction Locations tab lists existing WPM locations.
-
Click Add Location.
-
Select the method for adding a location.
In this example, the player is not already installed in the playback location. Therefore, select Install location on my network, and click Next.
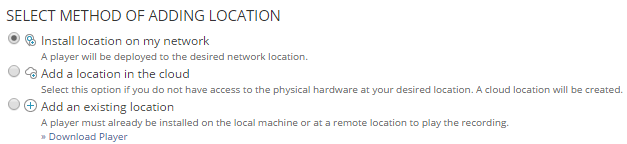
- Enter the server's IP address or host name, or select a node from the list. Click Next.
- Choose Use default settings, and click Next.
-
On the Location Credentials panel, select the location and enter the credentials to access the server.
- Select the check box to the left of the location name.
- Click Assign Credentials.
-
Select existing credentials or enter new credentials.
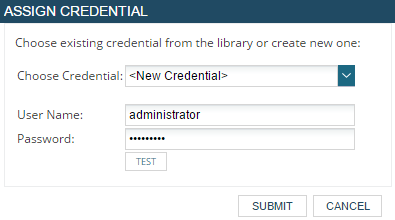
- Click Test to test the connection and credentials.
-
When the test succeeds, click Submit.
The location is added to the list.
If the location is not managed by Orion, the Status column tells you. This message is informational. The location does not have to be managed by Orion.
-
Click Deploy Player.
The SolarWinds Platform server connects to the server and installs the player.
Task 3: Record the steps that you want WPM to play back
To monitor Exchange, SolarWinds recommends creating multiple recordings:
- One recording that accesses the OWA (Outlook Web Application) through the load balancer
- Other recordings that access the OWA through each Exchange server in your network
Creating a separate recording for each server helps you identify problems with a specific server.
- From a computer with access to the Exchange server, download and install the WPM recorder (if it is not already installed).
- Choose Settings > All Settings.
- Under Product Specific Settings, choose WPM Settings.
- Under Transaction Management, choose Manage Recordings.
In the note above the list of recordings, click Download recorder locally.

- Open the download package and follow the onscreen instructions to install it.
-
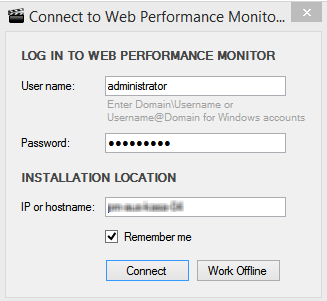
Start the WPM Recorder. (From the Windows Start screen, enter part of the application name and select WPM Recorder from the list.)
If you are prompted to allow WPM to lower your Internet Explorer security level, click Yes.
-
Enter your WPM credentials and the host name or IP address of the SolarWinds Platform server, and click Connect.
- Repeat the following steps to create a recording for each Exchange server and for the load balancer:
In the text box in the toolbar, enter the URL of the OWA on the Exchange server or the load balancer.

Click the record button
 .
. The recorder goes to the specified URL, and the Outlook login page opens.
Enter your Outlook credentials and click Sign In.
In the right pane, the Recorder adds each action you take as a step in the sequence.
- Sign out of Exchange.
Click the stop button
 .
. Click the play button
 .
. The Recorder plays the recording and times each step. The time is added to the information about each step in the right pane. When the recording finishes, a dialog shows the total time.
- Click OK to close the dialog.
- Click Save at the top of the screen.
- Enter a name and description in the Save As dialog, and click Save.
Task 4: Create a transaction for each recording
A transaction is a WPM recording that is associated with a playback location. Transactions specify a threshold for each recorded step. WPM plays back each transaction at a regular interval, and alerts you if any step exceeds its threshold.
Repeat these steps for each recording.
-
On the Manage Recordings page, select the checkbox next to the recording and click Start Monitoring.
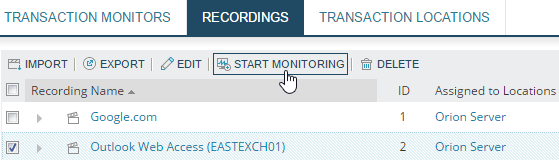
The Add Transaction wizard starts.
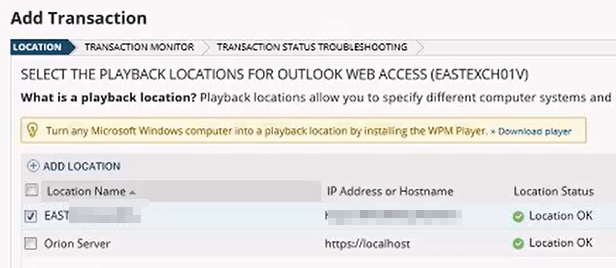
-
On the Location panel, select the location you added earlier. Click Next.
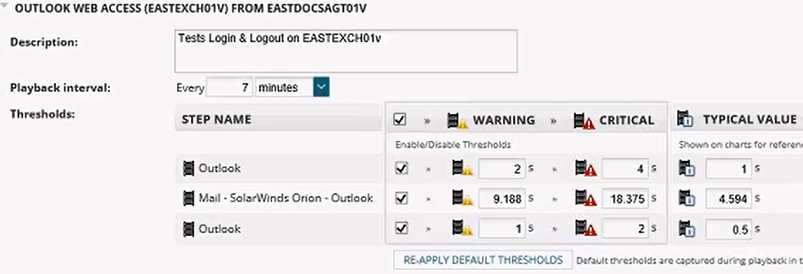
The Transaction Monitor panel shows the default thresholds. The Typical Value is based on the recording. The default Warning threshold is double that time, and the Critical threshold is quadruple that time.
-
(Optional) Adjust the default Playback Interval (which determines how often the recording plays), and change the default thresholds if they are not right for your environment. Click Next.
In this example, the interval is increased from 5 minutes to 7.
SolarWinds recommends that you leave the default thresholds for now and adjust them later if you receive too many alerts.
-
SolarWinds recommends that you link each transaction with the node (server) on which it is executed and applications it is monitoring. This provides additional troubleshooting information in the AppStack. If a transaction fails, the AppStack can show which Exchange server the transaction was executed on (instead of the load balancer in front of the servers).
- Select Improve transaction troubleshooting.
- Click Add Nodes.
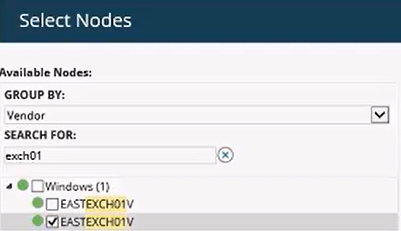
- On the Select Nodes dialog, enter part of the Exchange server name in the Search For box.
-
Select the server and click Save.
The node is listed on the wizard panel.
- Click Add applications.
- On the Select Applications dialog, enter part of the Exchange server name in the Search For box.
-
Select the Microsoft Exchange and Microsoft IIS applications running on that server, and click Save.
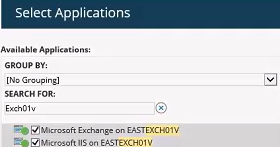
The applications are listed on the wizard panel.
-
Click Save Monitor.
The transaction will play at the specified interval in the playback location. If any of the steps take longer than the thresholds, an alert is displayed on the Transactions Summary page.
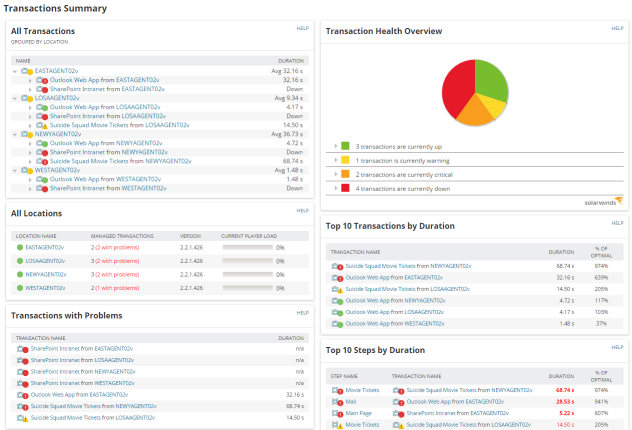
View transaction data from WPM
To view transaction data collected by WPM, choose My Dashboards > Web > Transaction Summary. The resources on this page highlight transactions whose duration is above the threshold you set, so you can tell at a glance whether users are having problems accessing the Exchange network.
WPM shows you:
- Transactions with problems
- Specific steps with problems
- The time it takes to complete each step compared to the baseline
Next steps
To configure other modules for comprehensive Exchange monitoring, see any of the following topics:
- Monitor Exchange servers and IIS applications with SAM
- Monitor the virtual Exchange environment with VMAN (only if your Exchange servers are virtualized)
- Monitor Exchange storage issues with SRM
- Monitor Exchange network performance with NPM
After configuring one or more SolarWinds modules:
- Set up alerts to monitor your Exchange environment.
- Filter the AppStack to show only your Exchange environment